Volume Joints
User-Guide
Create volume joints to refine and enhence you deformations. These joints are driven by 2 parent & child joints. Using the new UI, you can choose actions (translation/scale) to take for every angle direction between the 2 joint drivers.
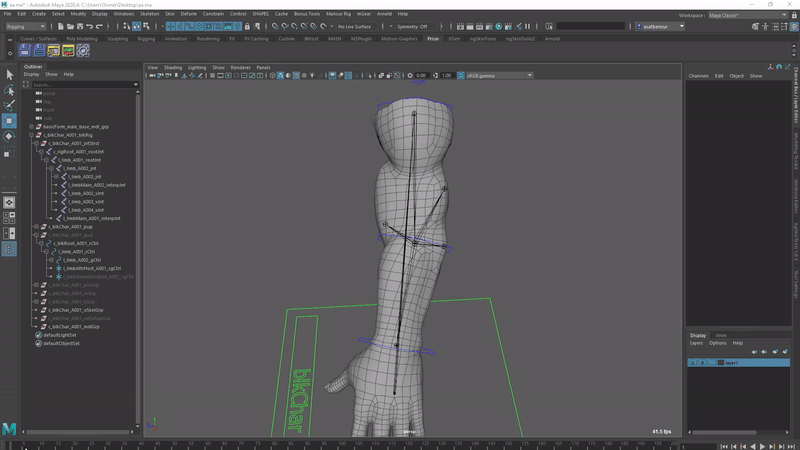
Example
UI
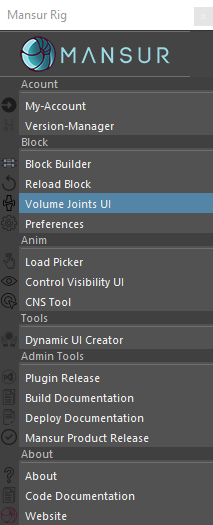
Access this UI via Mansur-Rig main Maya menu
Legend
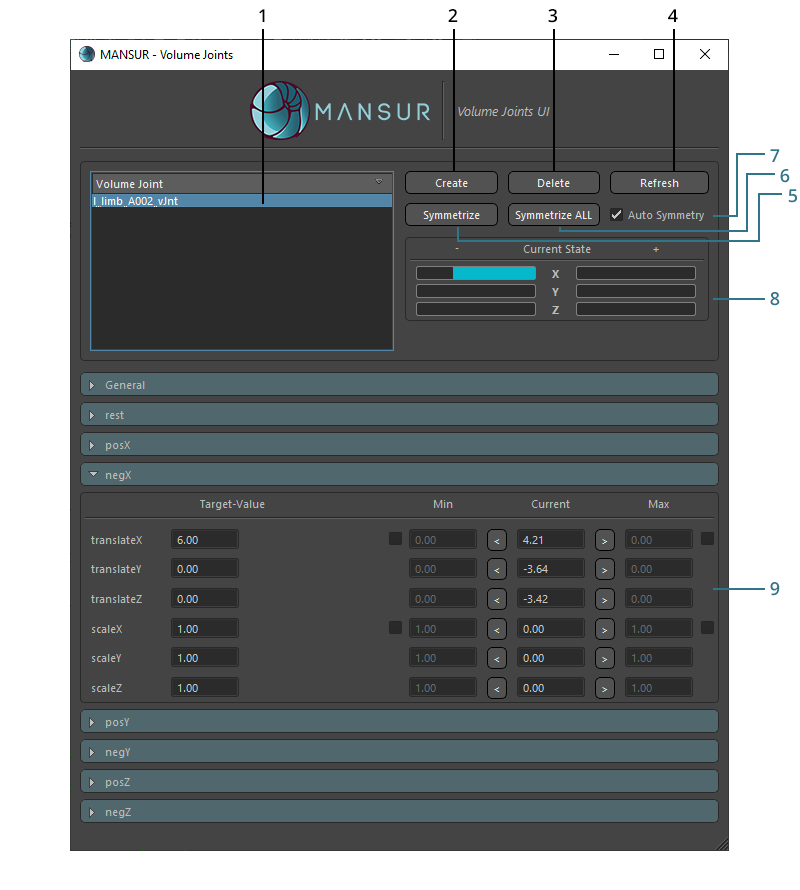
- Volume-Joint List- List of all Volume joints within the current scene. Use the Refresh(4) button to refresh.
-
Create- Creation button.
This will create a volume joint, based on the current scene selection.
The selected object should be the "child" item- meaning, if you want to create a volume joint for a knee, select an object relating to the lower leg section. This will create a volume joint between the upper-leg, and lower leg.
Valid selection object types are- Joints, Guides, Ctrls. In case a joint wasn't selected, the system will attemp to retreive the joint related to the selection. If the system did not find a related joint, nothing will be created.
Important note: Volume joints have a "Rest state"- which is the base state or "Zero" state- where nothing is triggered- when creating a volume joint, the current state will be set as the rest state. In case you want to update the rest position, use the "Set current as rest position" button undeer the General tab when the requested volume-joint is selected.
In case Auto-Symmetry(7) is selected, the system will attempt to create a symmetrical volume-joint (if relevant).
The amount of Volume-Joints is unlimited. -
Delete- Delete the selected volume joint.
In case Auto-Symmetry(7) is selected, the system will attempt to delete the symmetrical volume-joint (if one exists). - Refresh- Refresh the UI. Rescan the current scene.
- Symmetrize- Attempt to create/update a symmetrical volume joint based on the selected colume joint.
- Symmetrize ALL- Attempt to create/update ALL volume joints in the scene.
-
Auto-Symmetry- In case this is checked ON, all actions will attempt to symmetrize.
That includes- Creation, Deletion, Symmetry, any value edit.
This is recommended to be kept on. -
Current-State-Display- This section was design to minimize confusion when dealing with volume joints.
Based on the UI-selected volume joint, this display will update based on the current state of the angle relationship between the two master (source) joints.
When editting a volume joint's behaviour, it is very convenient to visually determine the current angle state the sources are in.
Since the angles are based on the guide's original orientation, this changes between modules.
For example, if you need to create a volume joint for an elbow, create it in rest-state, the "bend" the elbow- the display will indicate which direction the elbow bend is set to, so you can open the correct dropdown menu to edit the behaviour. -
Edit Section- This is where the behaviour for each volume joint is set.
-
General Section-
- Rotation-Blend attribute, which will determine the orientation blend between the parent and the child joints for the selected volume joint.
- Set Current As Rest utility.
-
Rest Section-
- Rest-Translation attributes
-
All Angle Sections-
- Translation-Target attributes
- Scale-Target attributes
- Translation-Limit attributes
- Scale-Limit attributes
- Current Values display
-
General Section-