Game Exporter
User-Guide
Example
General
- This tool was created to allow an easy animation/asset export process for animators.
- Using this tool, animators can easily process skeleton FBX exports with just a few clicks.
- This tool was primaraly designed to use for game-engine exports.
- Using this tool, you can quickly define the type of export needed (whether asset or animation sequence), and all needed parameters to export animations to FBX format without damaging the scene in any way.
- This tool also supports batch exports for multiple animation ranges within a single scene.
- The general workflow after there is an animation scene present, needed to be exported, is as follows
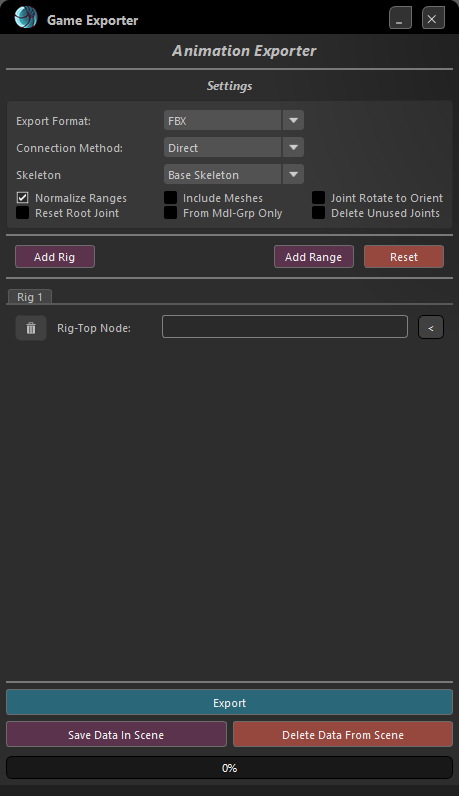
- First, once an asset rig/skeleton is complete, the sekelton is needed to be exported as a base-state asset. Simply "add-Range" using the button within the UI, and move to the "asset" option. Then choose a directory for the file to be written to, and click "Export". Both the skeleton and the bound geometry will be exported.
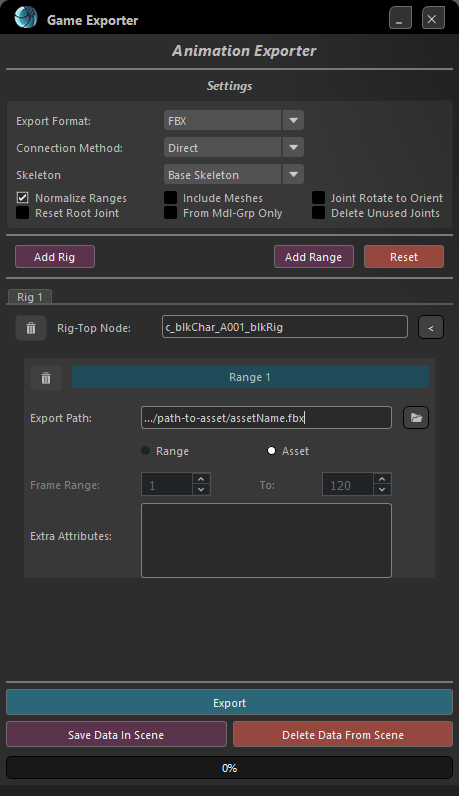
Game Exporter- Asset Export - Then, once you have an animation ready to be exported, use the same dialog in "range" mode to bake and export your animation sequence. You can export multiple ranges from the same scene in case needed.
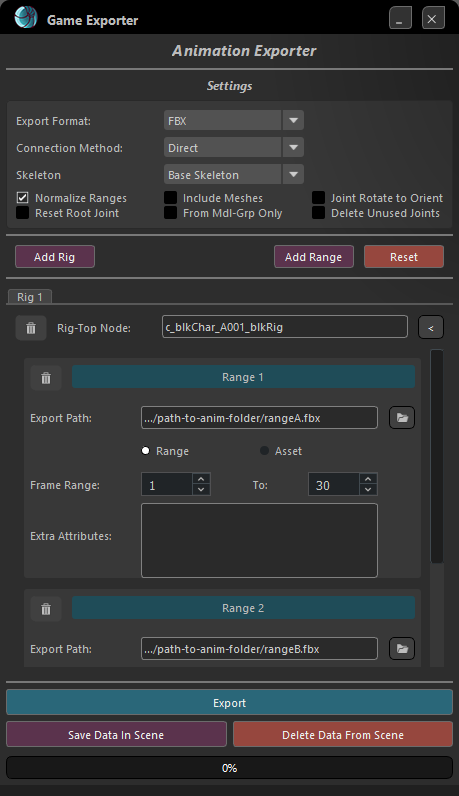
Game Exporter- Animation Export - The settings you selected will be saved within the current scene. So you can define the animation ranges for the selected scene once, then once you re-open the tool the settings will automatically load into the dialog.
- It is possible to export an asset as well as animation ranges in the same batch, in case needed.
- This tool supports multiple rig exports
- First, once an asset rig/skeleton is complete, the sekelton is needed to be exported as a base-state asset. Simply "add-Range" using the button within the UI, and move to the "asset" option. Then choose a directory for the file to be written to, and click "Export". Both the skeleton and the bound geometry will be exported.
General Settings
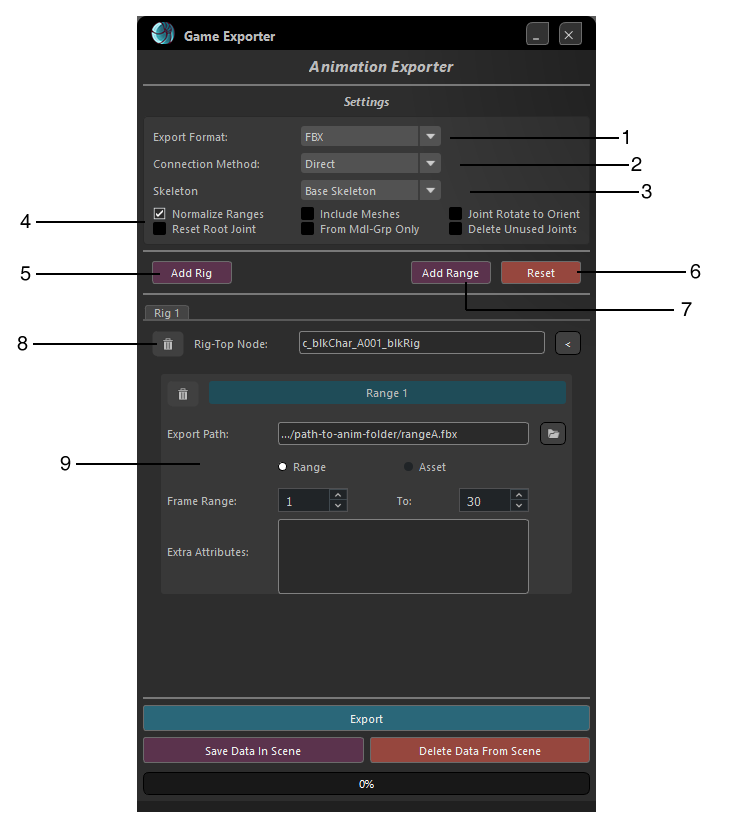
- Export Format- Exported file format. Currently only FBX is available.
- Connection Method- This setting sets the methid in which the new extracted skeleton will be connected to the original animation skeleton.
- Direct (default)- Use direct channel connection.
- Constraints - Use Parent and Scale Constraints connection. This method is slightly less reliable, but may be needed in some cases.
- Skeleton- Choose which skeleton is requested to be exported.
- Base Skeleton (Default)- This is the mian skeleton. This setting will be used 98% of times.
- Offset Skeleton - This option will bake and export the offset skeleton instead of the main skeleton, in case it exists.
- Export Settings
- Normalize Ranges- If checked, the animation ranges will be normalized to start from frame 1. For example, if the animation range selected is 30f-100f, the exported animation range will be normalized to 1f-70f. In case this isn't chacked, the selected range will be preserved. This is most useful in case you export multiple ranges from the same scene.
- Reset Root Joint - If checked, after asset/animation extraction, animation for the root joint will be deleted, and it will be reset to origin
- Include Meshes- If checked, the aniamtion exported will contain the skeleton's connected skinned meshed. This is only relevant in "range" mode. It is always true in "Asset" mode.
- From mdl-Grp Only- Normally, all skinned meshes to the selected skeleton will be extracted. If this is checked, only geometry under Block's Model-Group will be extracted.
- Joint Rotate To Orient- If checked, after the skeleton is extracted at base state, all joint rotation values will be converted to 'joint orient' values.
- Delete Unused Nodes- If checked, while extracting the skeleton from the rig, any joints that are not used in any connected skin cluster, will be removed from the heirarchy. This is most useful for performance maximization in game engined. Be-Aware! This means that the extracted skeleton heirarchy will be different then the one present in the rig, and any changes within the skin clusters related to the heirarchy will requst in a different skeleton structure.
- Add Rig- In case you need to export animations from multiple rigs in the same scene, you this button to add another rig tab to the view
- Reset- Reset current rig tab. i.e. Delete all ranges and rig top name
- Add Range- Add another range/asset to the current rig view
- Rig Top Name- Set the rig-top to export. This will be Block's rig top node. Simply select the node, and click the < button on the right to input it into the field
- Ranges/Assets View- This is where you set all of the targets for your export, for the current rig-top selected.