Module Preset Editor
User-Guide
This tool was designed to manage module presets.
As Mansur-Rig modules comatin many attrbiutes, it is sometimes more convenient to use a predefined preset to speed up the wrokflow.
Mansur-Rig includes some module presets, although this was designed mainly to allow usesrs to create their own presets, essentially saving the module settings' state in order to re-use later.
Important
Module preset actions are only relevant to the Module Settings tab within the module settings window. All common attributes (first tab) will be ignored.
UI
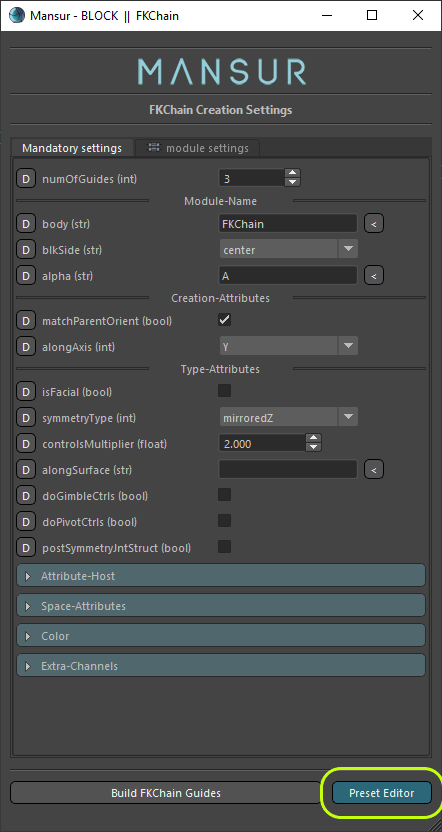
Access this Tool via the "Preset Editor" button within any module settings window.
Preferences setup
In case you want to use custom-presets, it is recomended to setup a local folder which you want to save your presets in, and add the path to Mansur-Rig's module preset paths variable.
At deafult, the tool will list presets within the UI only out of Mansur-Rig predefined preset folder <$MNS_INSTALL_PATH>/scripts/mansur/block/modulePresetEditor/mnsModulePresets
Since the system has no way of knowing where to find additional custom presets, you need to tell the system where to look.
The process is very easy:
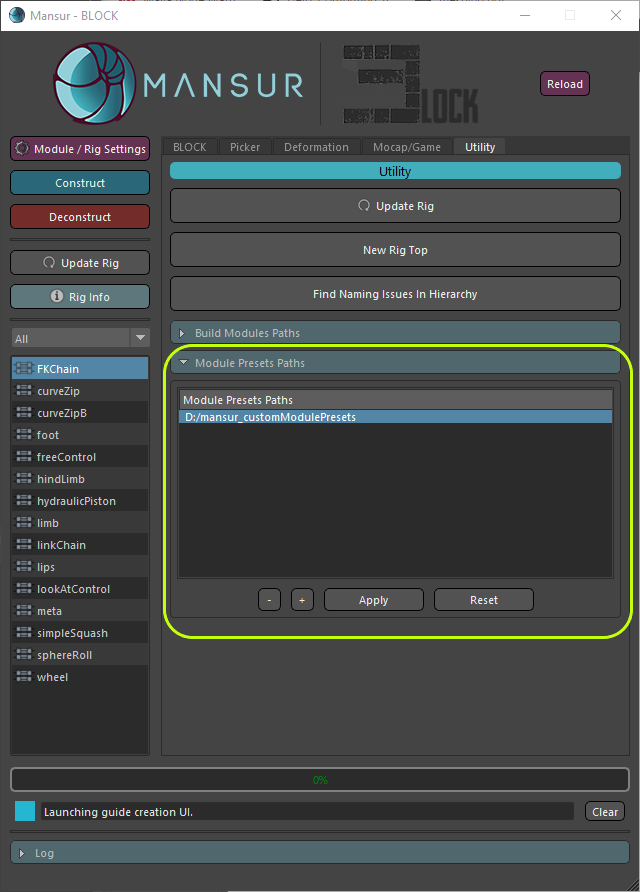
- Open Block Builder from Mansur's main menu.
- Move to Utility tab.
- Open the Module Presets Paths dropdown menu.
- Press the Add Path (+) button
- Navigate to the custom directory you want to add and click Select-Folder
- The directory will be added to the main preset directories list.
- Click Apply.
You will not need to repeat this step when restarting Block, nor when restarting Maya, this prefernce will be saved locally within Mansur-Rig's preferences folder.
You can add as many paths as you require.
Also, you can always go back to this dropdown menu to edit your custom preset paths.
Export Workflow
- Edit your module settings to best represent your preset.
- Open the module preset editor.
- Click Export.
- Input required information in the prompted dialog (Author, Preset Description).
- Press Export in the dialog.
- Chose the file name and the location where you ant to save it.
- Your new preset is now saved and ready to be re-used.
Import Workflow
- Open any module's settings.
- Open the module preset editor.
- It is recommended to follow Preferences Setup guide above to load custom presets folders information into the UI.
- Select the preset you want to use.
- Click Load button.
- The settings window will now consist of all data saved in your selected preset.
- To finalize, click Update Settings in the module settings window to apply your changes.
- Alternatively, if your preset isn't found in the UI, you can manually load it from file using the Import button.
Legend
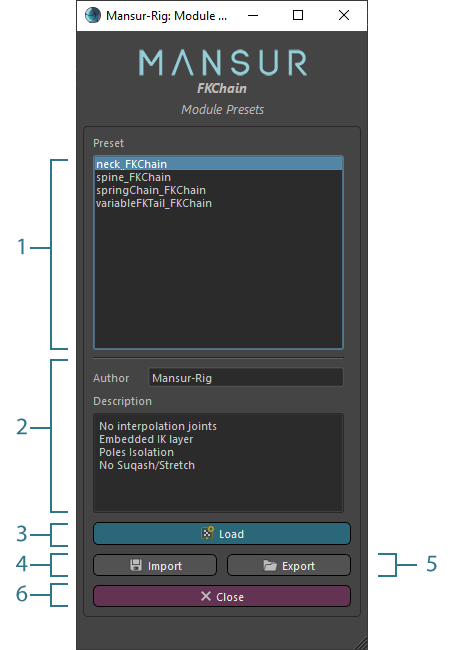
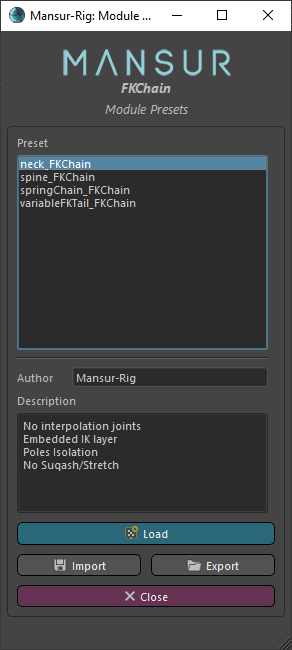
- Available Presets- All available presets, within all Module Presets Paths. Only relevant module preset types will be displayed. Meaning that if you loaded the preset editor from an FKChain type module settings window, only presets saved for FKChain type module will be displayed.
- Preset Author and Description- Information about the current selected module preset.
- Load- Update the module settings window with the currently selected preset.
- Import- Import module preset from a file.
- Export- Export the current module settings values into a module preset file.
- Close- Close Dialog.