Mocap And Game Tools
Mansur-Rig is equipped with a full toll-set to manage Mocap data as well as manipulate rigs to be game-engine ready.
This guide will cover the entire tool-set, and some example use-scenarions/workflows.
Block Builder- Mocap/Game tab
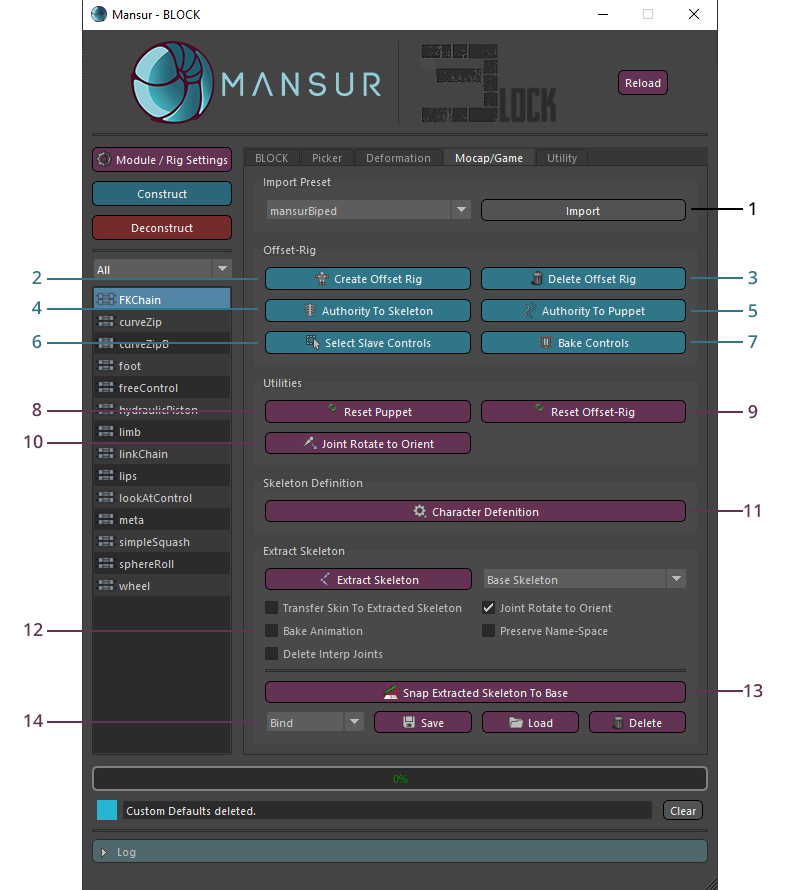
Offset-Rig Section
- Guide Preset section- Mnausr-Rig is delivered with pre-existing guide presets for ease of use. Use the Import button to gather the guide prset of you choice.
-
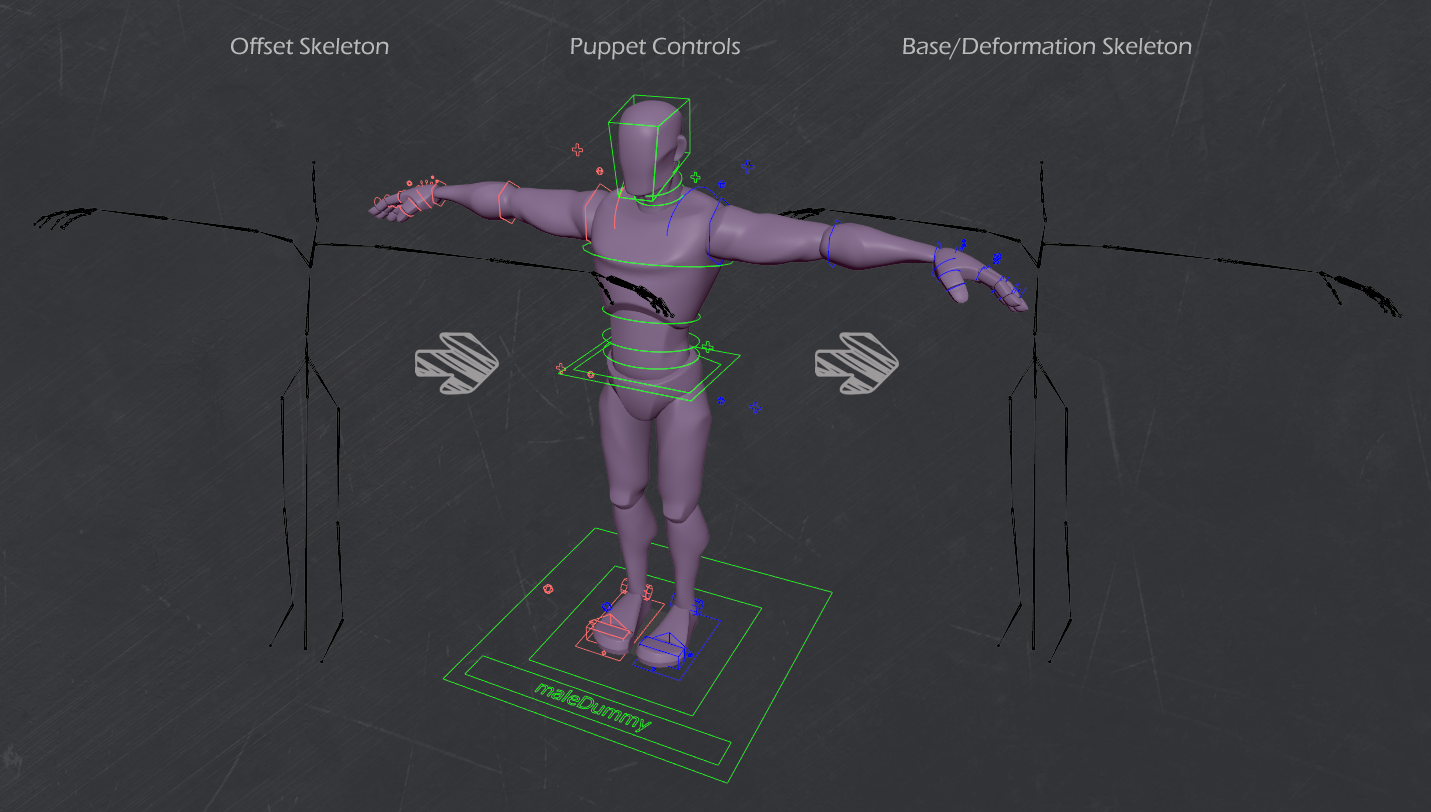
Create Offset Rig- A Block-Offset-Rig, is a joint skeleton, created from the base joint-structure, that can be used to control the puppet. In essence reversing the puppet structure. Instead of the puppet controling the skeleton, this new skeleton will control the puppet. The puppet will of course still control the base-skeleton which drives the deformations. This behaviour is used to import mocap data onto the offset skeleton, which drives the puppet. This in turn will allow you to bake the animation into the puppet-controls- for post-editting the animation/cleanup, mainaing the kinematics of the puppet.
The joint-control relationship is set within Block's internal contruct process, so you don't need to define it, the offset skeleton will know how to connect to the puppet automatically.
Note that the control isn't automatically transferred- use Authority To Skeleton(4).
- Delete Offset Rig- Delete the Offset-Rig, if it exists.
- Authority To Skeleton- Use this utilty to constrain the puppet controls to the offset-Skeleton. Make sure the puppet and offset-skeleton are in the same pose.
- Authority To Puppet- If the puppet controls are constrained to the offset skeleton, use this utility to release that connection, restorinng normal bahvaviour.
- Select Slave Controls- Select all controls that are set to be driven by the offset-rig connection.
-
Bake Controls- Bake the slave controls, within the current animation range.
If require further bakinng options, use Select Slave Controls(6) to select the slave controls, then use Maya's Bake-Animation utility.
Utilities Section
- Rest Puppet- Reset all puppet controls.
- Rest Offset-Rig- Reset the offset-skeleton.
- Joint Rotate To Orient- Attempt to transfer all joint rotation values into the joint orient values, to "zero out" the rotation values. This action will be performed on the entire seleted heirarchy.
Character Definition Section
- Character Definition- Load the Character-Definition Tool- which will allow you to charactraize your pupprts/skeletons into HumanIK, in order to retarget mocap data.
Extract Skeleton Section
-
Extract Skeleton- Use this utility to easily extract your puppet's skeleton, in order to export it.
Once you extracted your skeleton, you will be able to delete Block's rig, leaving only the skeleton (with or without animation) and your geometry (with it's deformation). This will make exporting using any tool of your choosing fast and easy. - Snap Extracted Skeleton To Base- Match extracted skeleton transformations to the base skeleton
- Pose Edit Section- Use these utilities to save\load dagPoses onto your extracted skeleton.
Character Definition Tool
This tool was created to enhance mocap data retargeting to Block rigs.
Using this tool, you can easily Characterize your puppets into Maya's Human-IK tool.
The goal behind this tool is to speed up your motion-capture data import workflow.
Not only Mansur-Rig is equipped with many mocap-data presents, it will also allow you to create custom presets easily and export them to re-use.
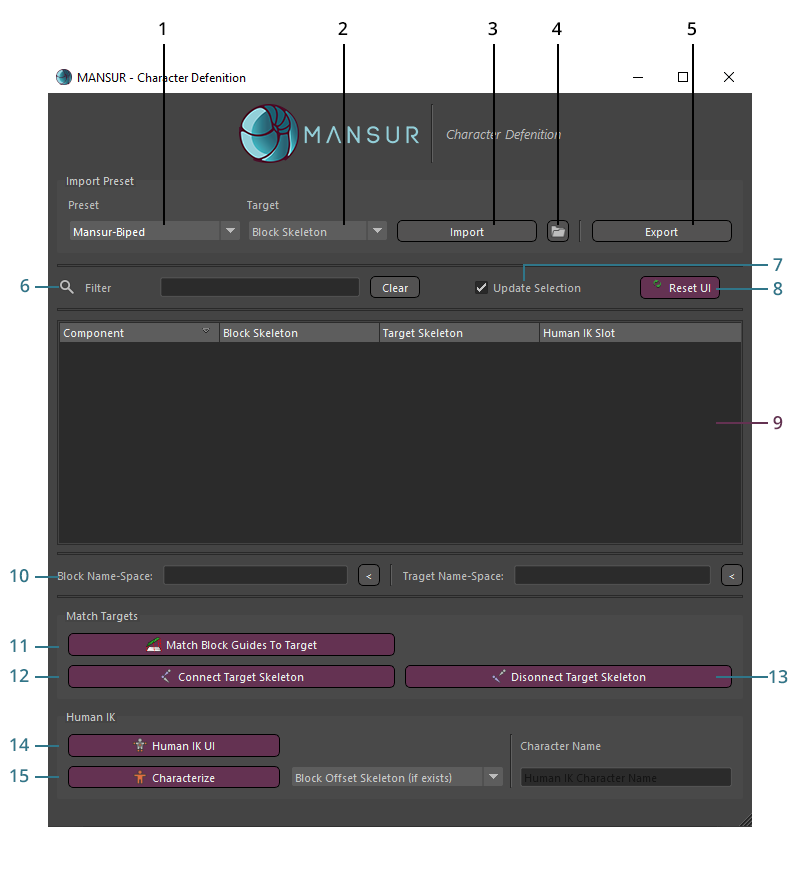
Presets import/Export
- Presets dropdown- Choose a predefined naming preset to import.
-
Target Column dropdown- Choose which column to import the preset to, or export from.
Humak-IK column will be exported always along side the column selected. - Import- Improt from the predifined preset selecter, into the selected column.
- Import From File- Improt from a custom preset file exported previously, into the selected column.
-
Export- Export the select column, as well as it's related Human-IK defintion into a file.
Use this preset later-on using the Import From File(4) utility.
Display Settings
- Filter- Filter UI display to easily find the component you are after.
-
Update Selection- When this checkbox is ON, the main scene selection will update based on the selected rows, in case any of the objects within it exists.
When OFF, scene selection will not be changed. - Reset UI- Clear the entire UI.
Data Section
-
Data Viewer- This is where all of the data is displayed.
Data in this UI can be editted, not only viewed.
In case you need to create a preset, you can always start with a similar preset and edit it to your needs to avoid creating it from scratch.
Right-Click- Edit menu
Double-Click- Free edit
Column description- Component Column- This culomn is the name of the component. This name is entirly up to you- it is simply an indetifier for the row.
-
Block Skeleton Column- This column represent the Block joint related to this component row.
Objects in this Column must be from Block's rig base skeleton- NOT the offset-skeleton. -
Target Skeleton Column- This column represets a joint from an external source (not block).
The target skeleton may be a skeleton you wish to retarget data from, or retarget data to.
This skeleton can be any skeleton.
In case a preset doesn't exist for your target skeleton, you can always create a custom one yourself. -
Human-IK Column- This column represents the Human-IK slot this row is related to.
Since Human-IK slots are pre-defined, this column can not be editted freely.
Please use the right-click menu to access all Human-IK slots.
-
Name-Sapces- In case your target/block contain a namespace, input it into the correct boxed.
In case a namespace exists for a target/block skeleton and they are not inputed correctly, the objects won't be found and the characterazation process will fail.
For ease, simply select one of your name-spaced objects and press the arrow button to the right of the box you want to input it to.
Match Section
In case you have a skeleton you wish to animate (Metahuman for example), and you need a puppet for it, you can use this section.
-
Match Block Guides To Target- Match the Block guides position to the target skeleton.
Simply input all of the data into the UI, using presets/edit, while your Block-skeleton column is set to an existing Block-Rig (in deconstructed state), and match the guides' position to the target skeleton you want to animate.
Once again, The Block column input should contain base skeleton objects.
When using this utility, the system will find the correct guides automatically.
Then, you can construct your rig to aquire a fully functioning puppet.
Then simply use Connect Target Skeleton(12) to connect your target skeleton to the base skeleton.
Now you have a fully functional animation puppet you can animate your skeleton with. - Connect Target Skeleton- Connect a Block puppet to the target skeleton in order to animate.
-
Disconnect Target Skeleton- Break the connection between Blok puppet and the target skeleton (if exists).
When you finish animating, you can simply bake your target skeleton animation, disconnect the connection to Block's puppet.
Human-IK section
- Humak-IK UI- Open Maya's Human-IK tool.
-
Characterize- Create a Human-IK character definition based on the current data.
You can do this for both Block skeleton and the target skeleton.
This process will create a new character definition in Human-IK, and attempt the connect all objects to their related slot within that character definition.