LODs Tool
User-Guide
LODs Tool is a simple way for managing visibility switches between model states.
Often, a given model has different states, or different resolutions, which can be switched while animating to gain performance. These states are most commonly known as LOD (Level-Of-Detail) modes.
Using this tool you can simply create LOD grouping (as many as you need) and input transforms into these groups to switch visibility states using a simple Enum attribute that will be created automatically (both in deconstructed and constructed states of Block rig).
This tool can also be used to switch between model variations, or clothing variations of a model.
UI
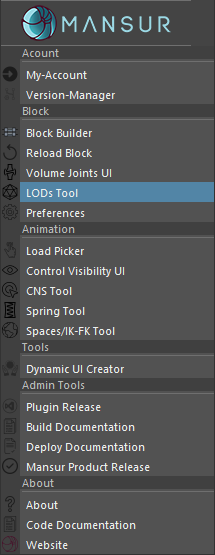
Access this Tool via Mansur-Rig main Maya menu
Workflow
- Open the tool.
- Select any component of a Block rig. If any previous LOD setting were created for this rig, they will be displayed within the UI. If not, only the Rig(1) indication will display the name of the selected rig.
- Start with adding a LOD group by clicking Add LOD(6). A new LOD column will be created in the LOD groups section(5).
- Repeat the previous step to add more LOD groups (columns).
- Use the Right-Click Menu(8-11) (using right click in the LOD groups section) to edit the contents of each group (selection based). Any transfom can be added here.
- Once you are done editting your LOD groups, click Apply Changes. This will write the data into the rig, and UI will refresh.
- Now you should see that the Current LOD(2) drop-down now contains an item for each LOD group you selected. You will also notice that the visibility channels for the nodes you selected are already connected. Using the Current LOD(2) drop down you can now switch between states.
- In case you want to switch states in deconstructed state without using the UI, simply look for the LOD Vis attribute created on the root guide.
- For the constructed state- the default attribute host will be the world control. In case you want to change the host in constructed state, simply open the UI again, and input the host into the LOD Attribute Host(3) box. Once you re-construct, the LOD Vis attribute will be created on your selected host.
Legend
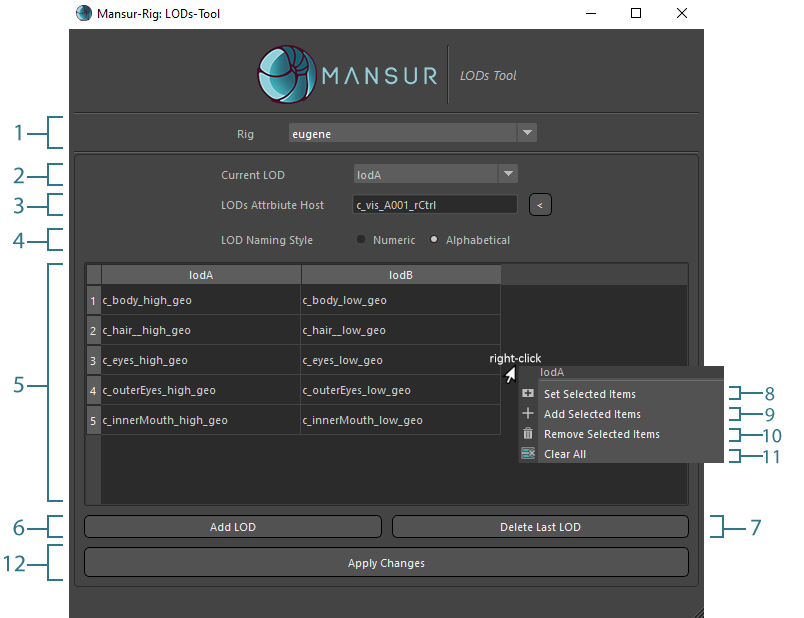
- Rig- Selected Rig indication.
- Current LOD- Switch between existing LODs using the UI.
- LODs Attribute Host- Input the constructed state attribute host for the LOD switch.
- LOD Naming Style- Select your prefered naming style. Alphabetical will result in lodA, lodB, lodC... style naming. Numeric will result in lod1, lod2, lod3... naming style.
- LODs Defenition- This is where the LOD groups data is displayed and editted. Edit your LOD groups using the righ-click menu (8-11).
- Add LOD- Add LOD group, increasing the amount of LOD groups.
- Delete Last LOD- Remove the last LOD group, decreasing the amount of LOD groups.
- Set Selected Items- For the selected LOD group (column), set the selected scene nodes as the group's content. This will replace any existing members of the group.
- Add Selected Items- For the selected LOD group (column), add the selected scene nodes as the group's content. Existing members of the group will be kept.
- Remove Selected Items- For the selected LOD group (column), remove any UI selected members from the group.
- Clear ALL- Clear ALL Data. All LOD groups and members will be removed.
- Apply Changes- Once you are happy with your data, apply (write) it into the rig.