Dynamic UI Creator
General
Believe it or not, this is one of the very firsts tool to be developed within Mansur-Rig, and many UI behaviours are based on it.
It is an extremely powerful tool, despite it's simplicity.
This simple UI, hides great strengths.
On initialization, this tool will list ALL methods within Mansur-Rig's entire Python library.
Then, when you choose to Create-UI- a simple UI will be created for the method selected.
This means, that you can run ANY of Mansur-Rig's methods, using a UI, instead of calling it through code.
This tool will live-examine the method you select, acquiring all arguments as well as all keyword-argumets, including all of their settings, and compile them into a simple UI for you to be able to use without even touching code.
In this guide I'm going to show you how to harness this tool's strengths to your advanatage.
UI
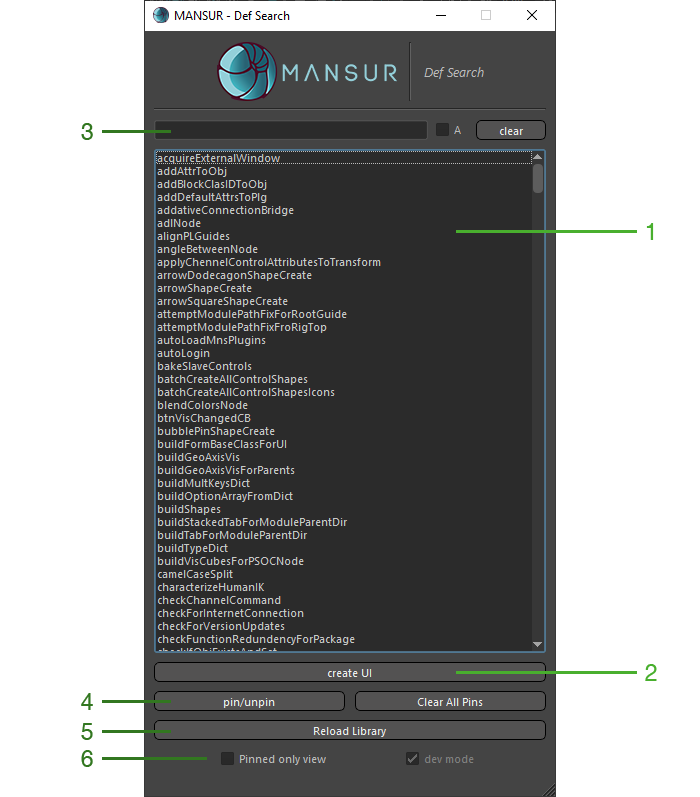
Legend
- Methods list
- Create UI button- will create a simplified UI for the selected method. Use Mouse-Double-Click on a method as a shortcut.
- Fliter/Search Section
- Filter methods by entering text into the search field.
- A Checkbox - will determine whether the search is case-sensative or not.
- Clear button will clear the serach field and reset the list.
- Pin/Unpin- Toggle methods betwen pinned and unpinned options. Use Mouse-Right-Click on a method as a shortcut. Pinning a method is equivalent to Saving-To-Favorites. Whenever you pin a method on the list, it will be marked in bold font, and moved to the top of the list. Use this feature to save your most used methods instead of needing to search them every time you load the tool. Pinned methods will be saved as a global preference, and will be restored when you restart the tool or restart Maya. Un-Pinning a method will remove it from your pinned methods. Use Clear All Pins* button to clear all of your pinned methods and reset the tool to it's default state.
- Reload Library- Use this method in case you are a developer, and you are making live changes to methods, and want to reload your changes.
- Toggle between Pinned Only View and default. In Pinned Only View only pinned methods will be displayed in the methods list.
User Guide
The best way to explain how to use this tool is by examples:
Example 1- create-offset-group
Let's say that you are happy with your Block rig, but for some pipeline requirements you need to create an additional offset-group for one of the contorls.
This tool is the easiest way to do that.
Here is what you do:
- Load the Dynamic UI Creator from Mansur-Rig's main menu.
- In the search field, type- createOffset. This will filter all methods with this text in it.

createOffset Filter - In the filtered results, you can see there is a method named createOffsetGroup which looks like what we are looking for.
- Now you could simply try and see if that works, but even better is to take a look at this method's documentation.
- In order to do that, oepn a browser and go to the Code-Documentation section in Mansur-Rig's docs page.
- If you know where this method is located within the Python library, you can simply navigate to it, but this is most likely not the case.
- So in top-right-hand side you'll see a search bar- simply type the name of the method into it -createOffsetGroup, and click search.
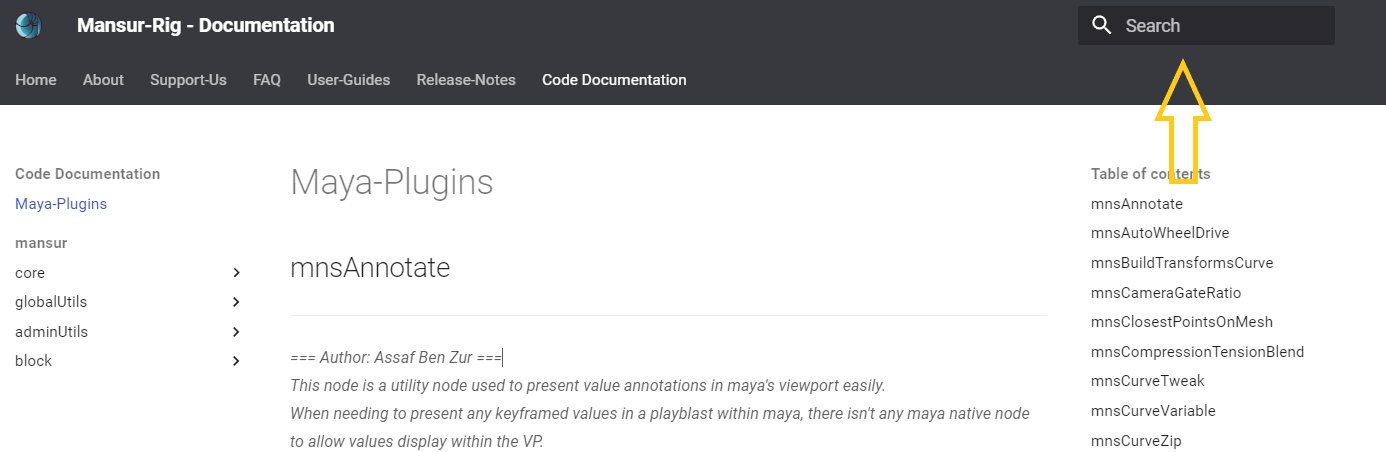
Documentation page search bar - There you can simply find the documentation for the given method:
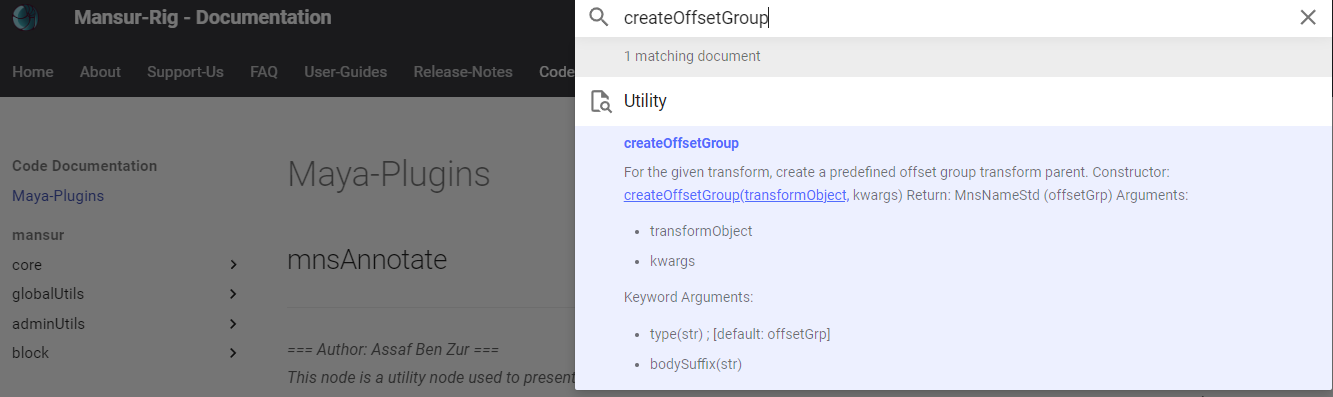
Method's Documentation Search - Now click the method's link to navigate directly to it's documentation
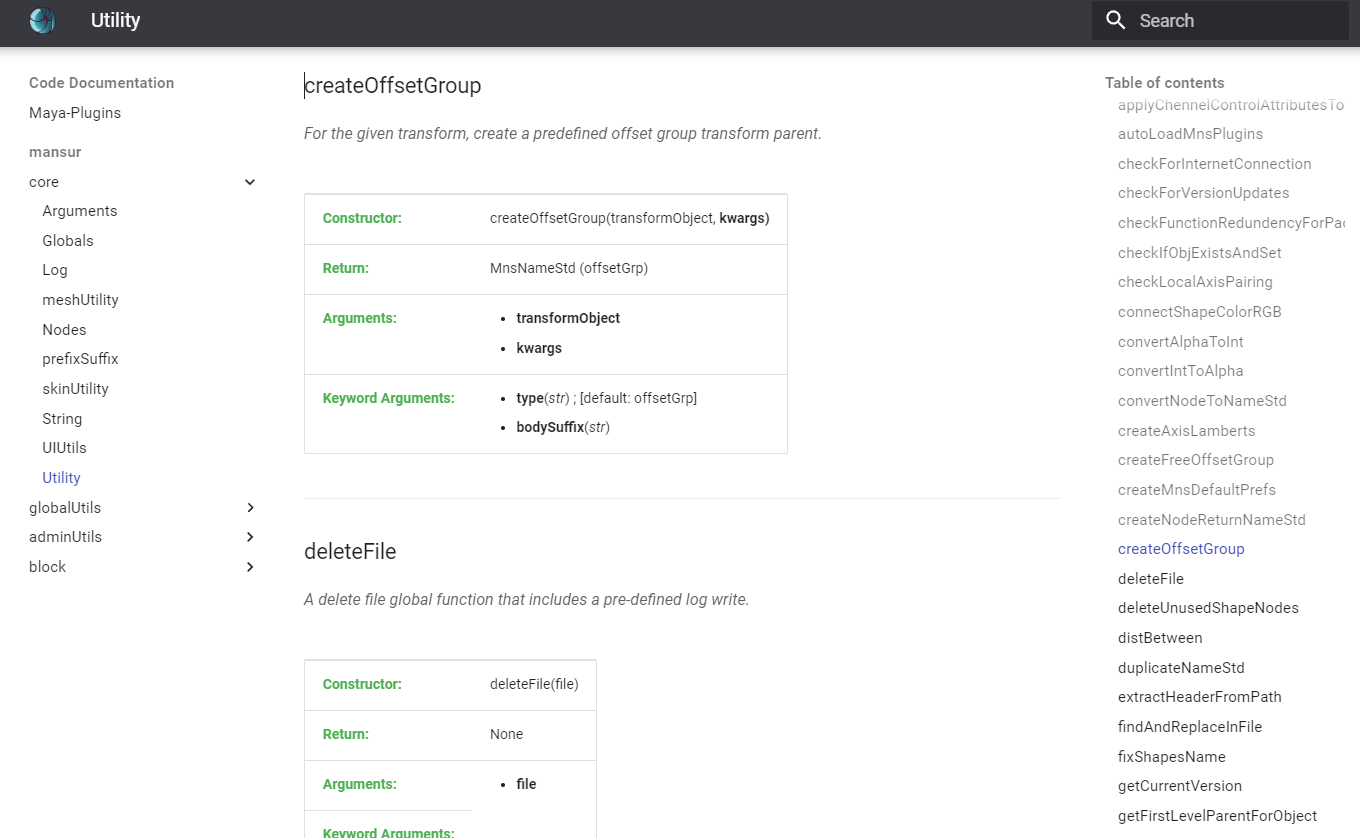
Method's Documentation -
Reading the description of the documentation it is clear this is the method we are looking for. You can also see all arguments and keyword argumets definitions within. For this specific case we see a single argument:
- transformObject
and 2 keyword argumets:
- type
- bodySuffix
-
Going back to Maya, click the Create UI button while the method is selected, or double click the method to initiate the UI.
- Now we see a UI representing the method, with a row for every argument and keyword argument for this method:
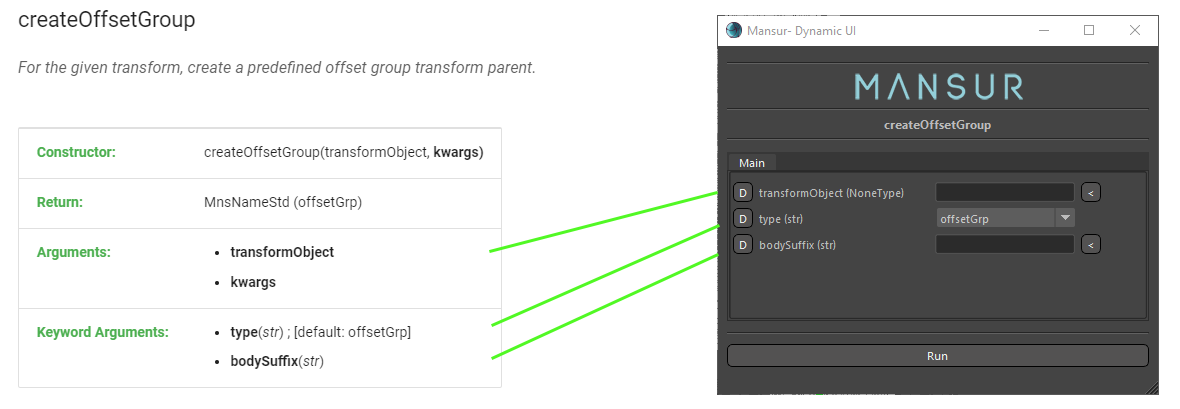
Method's UI - The UI correlates directly to the method's documentation, and is being dynamically created after fetching the method's informaion directly from the Python library. Also, each row within the UI is being created based on the value type for each argument.
- Now let finallly test it out:
- Select one of your Block-Rig's controls, and click the < button next to the transformObject argument row, to insert it into the UI
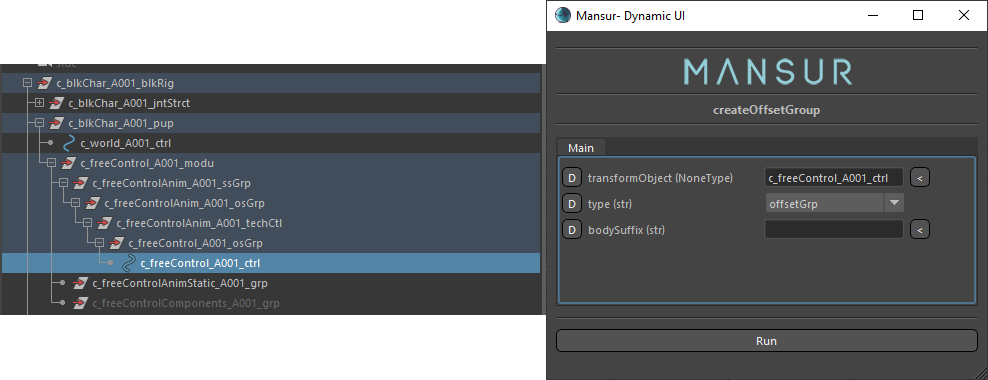
Ctrl Load - Click Run button- And this is the result. An offset group was created for the target control.
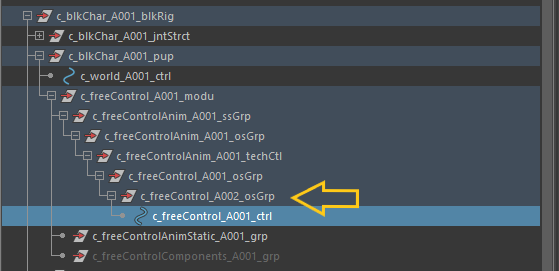
Result
- Select one of your Block-Rig's controls, and click the < button next to the transformObject argument row, to insert it into the UI
- This will be equivalent to doing this using Python:
from mansur.core import utility as mnsUtils mnsUtils.createOffsetGroup("c_freeControl_A001_ctrl") - You can also expand this, once you tested the behavior manually, to automate this process using the Custom-Scripts user guide
- This is the simplest way to explain how this tool works. In general, this tool will generate a UI for every single method within Mansur-Rig's custom Python library, which is HUGE. You can use this tool to enhece your rigging process, learn how the code works, experiment, and testing manually before automating.
- Also, you can of course look for methods within Mansur-Rig's Documentation Page and then test it out using this Dynamic-UI tool.
Example 2- mnsAnnotateNode
Now lets try a differt example, where you need to create a node, whether one from Mansur-Rig's custom plugin library, or a native Maya node, easily without dealing with code or node-connections.
In this example, we will be ceating a simple mnsAnnotate node.
- Lets start by assuming you watch this mnsAnnotate Node You-Tube video, and you would like to to try it out yourself. The easiest way to do that would be to use this Dynamic-UI tool.
- Once again open the Dynamic-UI tool and type mnsAnnotate within the search bar
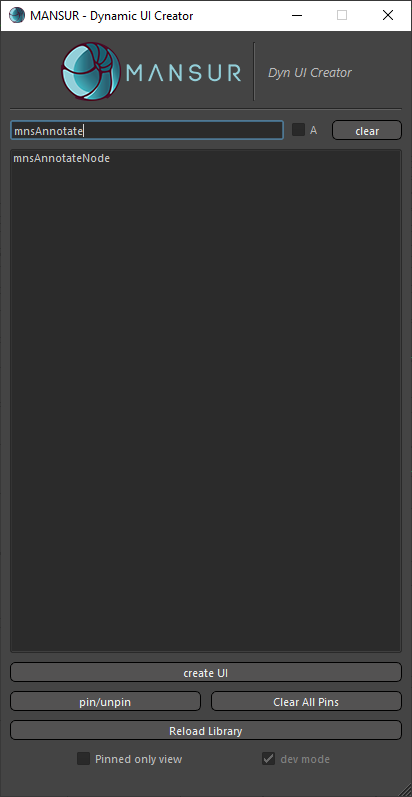
mnsAnnotate Search - Once you found the relevant method, double click it to load the UI.
- Let's compare again against the Method's Documentation
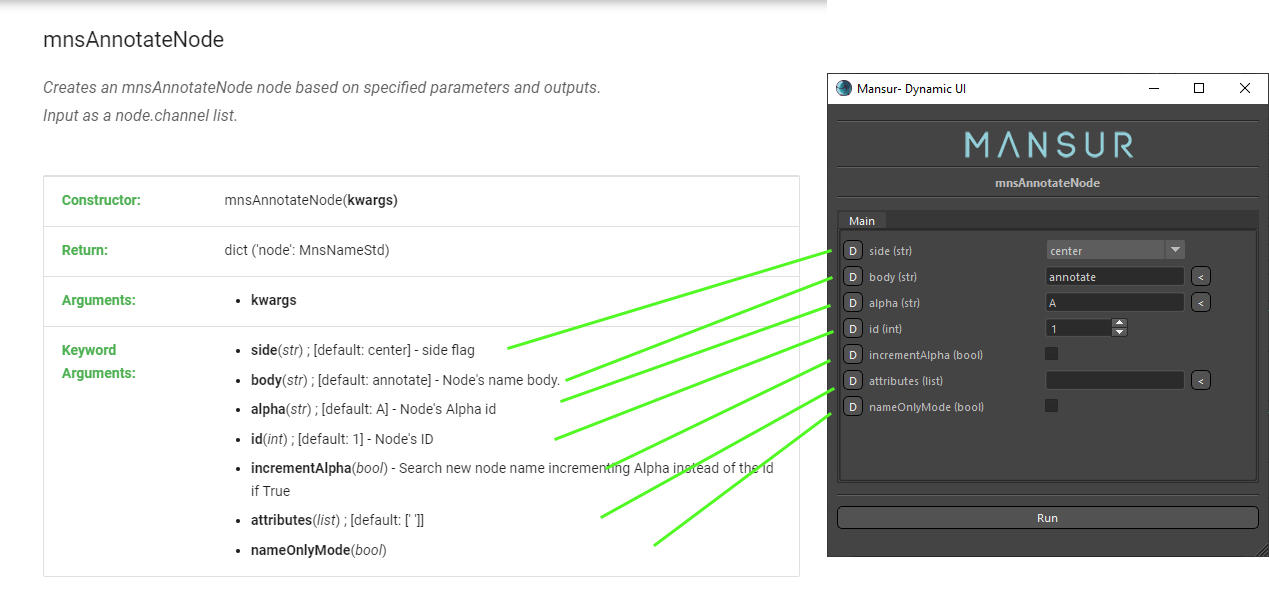
mnsAnnotate UI - Once again we see a direct correlation between the method's definition and UI created, as well as all arguments represnted, based on their type, within the UI.
- After reading the Method's Documentation and seeing the Video it is clear the most important argument is the Attributes argument, which is the list of attributes you want to annotate.
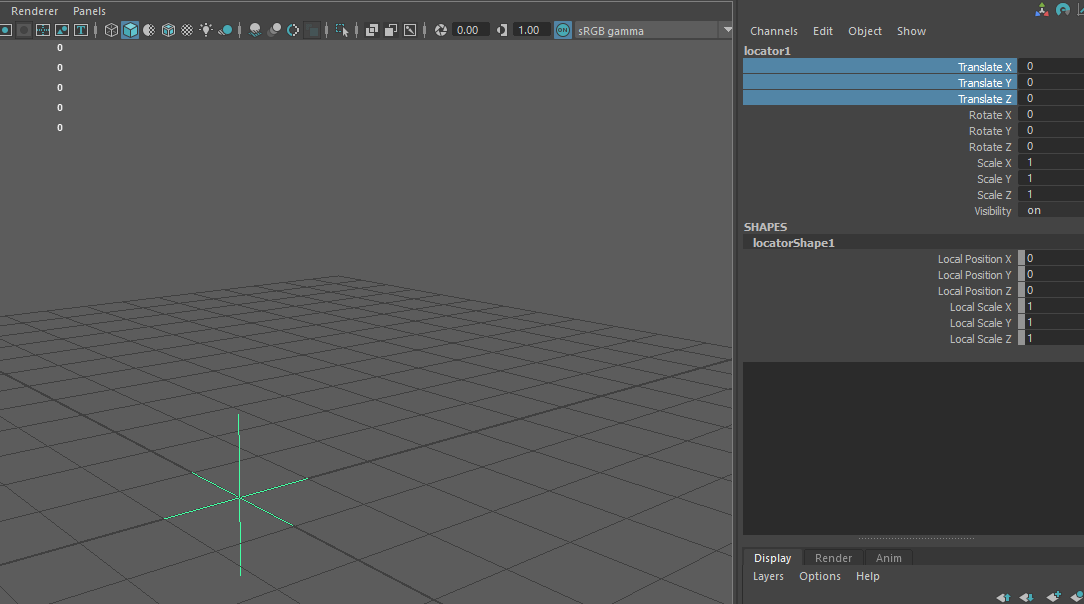
- So now make a channel-box selection of the attributes you would like to annotate:
Channel-Box Selection - Now click the < button to the right of the Attributes argument row, to input your selection into the UI:
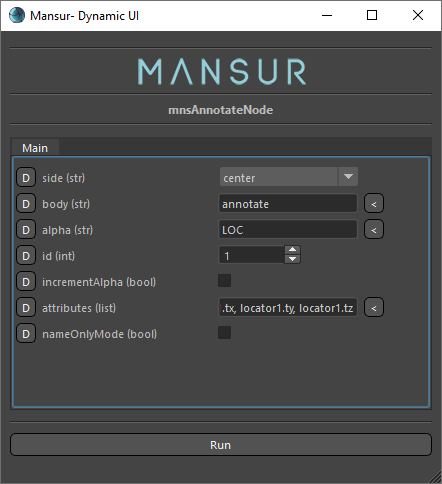
Channel-Box Attributes Inserted - Click Run button.
- And as easily as that, a mnsAnnotate node was created, as requested, with all connections made automatically, to the requested attribues.
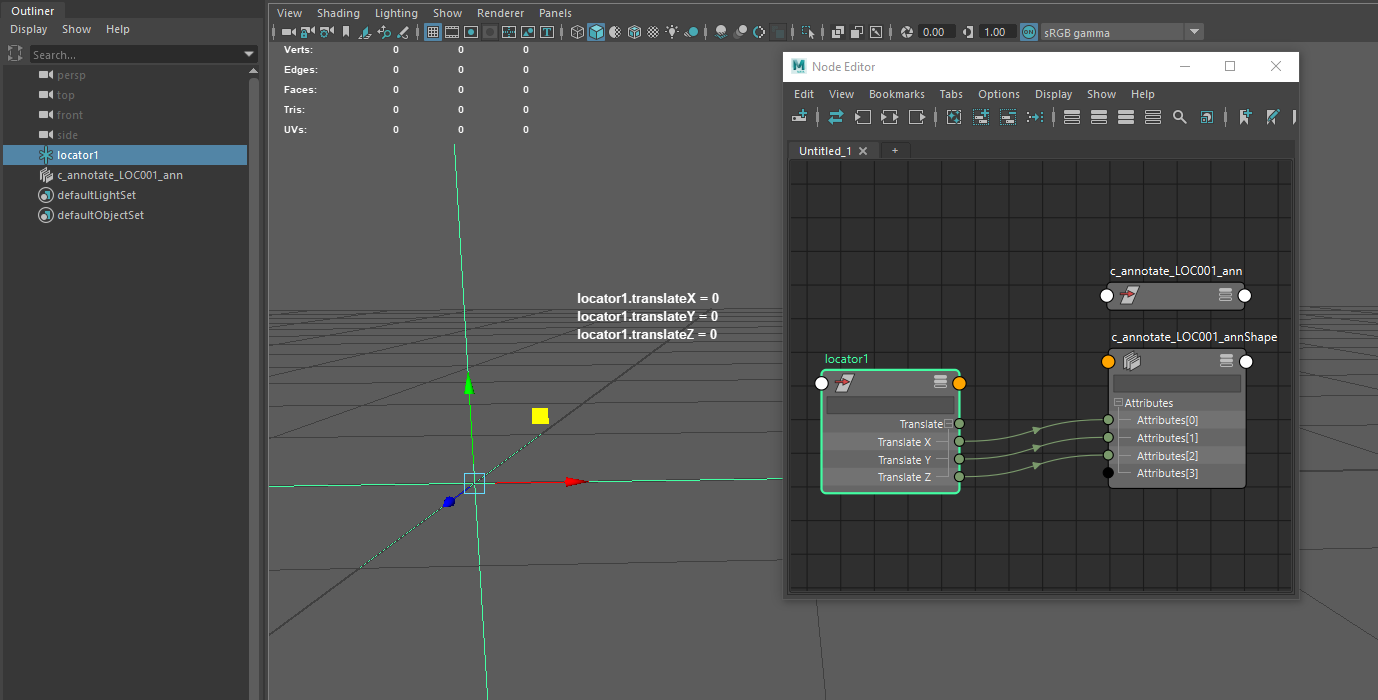
Result - Once again this will be equivalent to this Python code:
from mansur.core import nodes as mnsNodes
mnsNodes.mnsAnnotateNode(attributes = ["locator1.tx", "locator1.ty", "locator1.tz"])